DRAFT-DRAFT-DRAFT-DRAFT INCOMPLETE
If you’re just getting started with planning a low-power FM or other small FM station, this explanation and diagram of a simple station is a place to begin the conversation. We’ve seen stations even simpler than this example, and most are more complicated — some tremendously so. It all depends on your needs, volunteers, programming dreams, budget and cash flow. If you want responsive, personalized consulting to help you plan and design your station, we offer that service.
We’ll start with a simplified station connection diagram, and explain it below. Many things in the diagram are clickable links to sections of this document — the [back] button is your friend. Our goal is to give you enough information to make high-level choices which work, but not to explain everything in great detail nor defend our choices at length nor list every possible suitable brand and model of equipment.

Creating Program Audio
Most stations will create and playback audio using a bunch of gear we tend to call the “studio” — microphones, automation computer broadcast mixer etc. If you already have a studio and perhaps are broadcasting online, or are going to rebroadcast a web audio feed 24×7 like many faith-based stations do, skip ahead to Emergency Alert System. Many stations also have a second studio for training, offline audio production, and to use while the main studio’s offline.
Microphones
 From the PA system in the grungy local club, to top vocalists like Robert Plant, one of the most popular vocal microphones in the world for many decades turns out to be a great first choice for new radio stations.
The Shure SM58 is tough as hell, has a built-in windscreen (many people still add a foam ball or a pop screen), is directional to work in high-noise environments (helps with the crappy acoustics in many new studios), silences hand noise (and cheap mic-stand noise), and is inexpensive enough that you won’t cry if one walks away. If you upgrade later (Shure SM7 or EV RE20 are common choices), relegate the SM58 to the 5th guest microphone or your field-recording or live-remote kit.
Teach everyone how to use ’em right, which takes a few minutes, and you may never feel a need to upgrade — Plant never has.
CDs and Laptops and Flash Drives — Oh my!
We’ve built stations where nobody actually ended up using the CD players! Every station is different.
 One way to simplify things uses “everything” players like the Tascam CD-400U and similar models by Denon and Marantz. The CD-400U plays CDs, SD cards, music files from USB flash drives, Bluetooth (pair with phone/laptop) and standard 3.5mm auxiliary stereo cable (from laptop, cell phone, mp3 players — yeah you still have one?). Since broadcast consoles are priced by the number of input channels, and these all-in-one players cover so much media, they’re a great way to get more from a less-expensive broadcast console.
Most stations these days have DJs bringing in their own music devices, and these’ll hook ’em up.
The controls can be a little complicated, and their CD drives aren’t broadcast/industrial quality (which are hard to find!) and may not last long under constant use. That’s less of a problem over time as more stations rip the CDs to their computer anyway, but consider keeping a spare on hand if you rely on CDs — they’re not terribly expensive.
If you’re looking for rugged turntables and CD players, ask DJs from busy clubs.
Computer(s)
Even in an old-school analog radio studio, computers (and networks) are no longer an afterthought! They’re used to: download and play syndicated programming, play music from a music library on the hard drive, record and edit shows, and most essentially, schedule and play audio when nobody’s around — few stations can live without radio-automation software these days. If you don’t yet know a trusted computer geek, it’s time to find one.
If you have a lot of volunteers using a computer, make a plan in case it gets infected and needs to be wiped clean and reinstalled. Losing your automation recipes and music library is devestating, so some stations put those on a second computer which is locked down and administered carefully. The good news is that computers for playing audio don’t require giga-gaming-BS and colored lights because audio is just not very demanding, so they don’t need to be expensive.
Mac, Linux, and Windows all work fine. It’s probably most important to match your operating-system choice with whatever expertise will be available over time — and then stick with it. Once you get started with automation software, it’s almost never worth switching to a different platform.
For stations using Windows or Linux, Paul’s been recommending refurbished enterprise-class PCs for some time, and has this to say about it:
- Unlike home and consumer-grade PCs, enterprise-class PCs are meant to run 24×7, are easily repaired, and last for a long time — hospitals and libraries don’t like to screw around. Enterprise-class PCs are consequently a lot more expensive new, but in the secondary market are much CHEAPER (think $100) than riskier, less-reliable new consumer PCs.
- They’ve been running for a few years in a hospital or library, which means they have lived past the time when most PC failures occur.
- Get one or two identical models for spare parts, or to set up for practice or whatever. In 8-10 years when one eventually fails, you can just pop your hard drive into the identical unit and be back on the air in minutes — often with no tools required either (remember: enterprise quality). Parts will be getting hard to find by then too.
- Typically you provide your own monitor(s). The included mouse and keyboard are functional but cheap, and high-quality replacements can be found in every geek’s, organization, and recycler’s closet.
- You might be getting curious about sound cards…. More on that shortly.
- Here are the cigar-box-sized unit’s I’ve been using, and related models with variations in memory and disk etc are OK — just read the fine print. I’d trust units from Lenovo and Dell too. Ask amazon about B07YQ4TYHK or B082MPZ839 and sometimes I end up needing a Displayport-to-HDMI adapter like B07ZNNRYFL
Other IT issues to consider: backups, security, equipment failure/recovery/replacement schedule, drive sharing, automatic OS updates, keeping drives from filling up, automated recordings, remote access etc.
What about sound cards? The good news is that most broadcast consoles look just like USB sound cards to a computer, so… no sound card to add!
When you have more PCs than broadcast-console USB ports, use sound cards with audio cables. Your particular console’s inputs will determine which type of sound cards, but something like the Focusrite Scarlet and its many equivalents (from Behringer, Presonus etc) will usually work fine. The built-in computer sound card is often good enough on its own. We’re glossing over balanced “pro” +4dBu vs unbalanced “consumer” -10dBv levels and connector types. It’s a lot to cover, and depends on your console.
Headphones
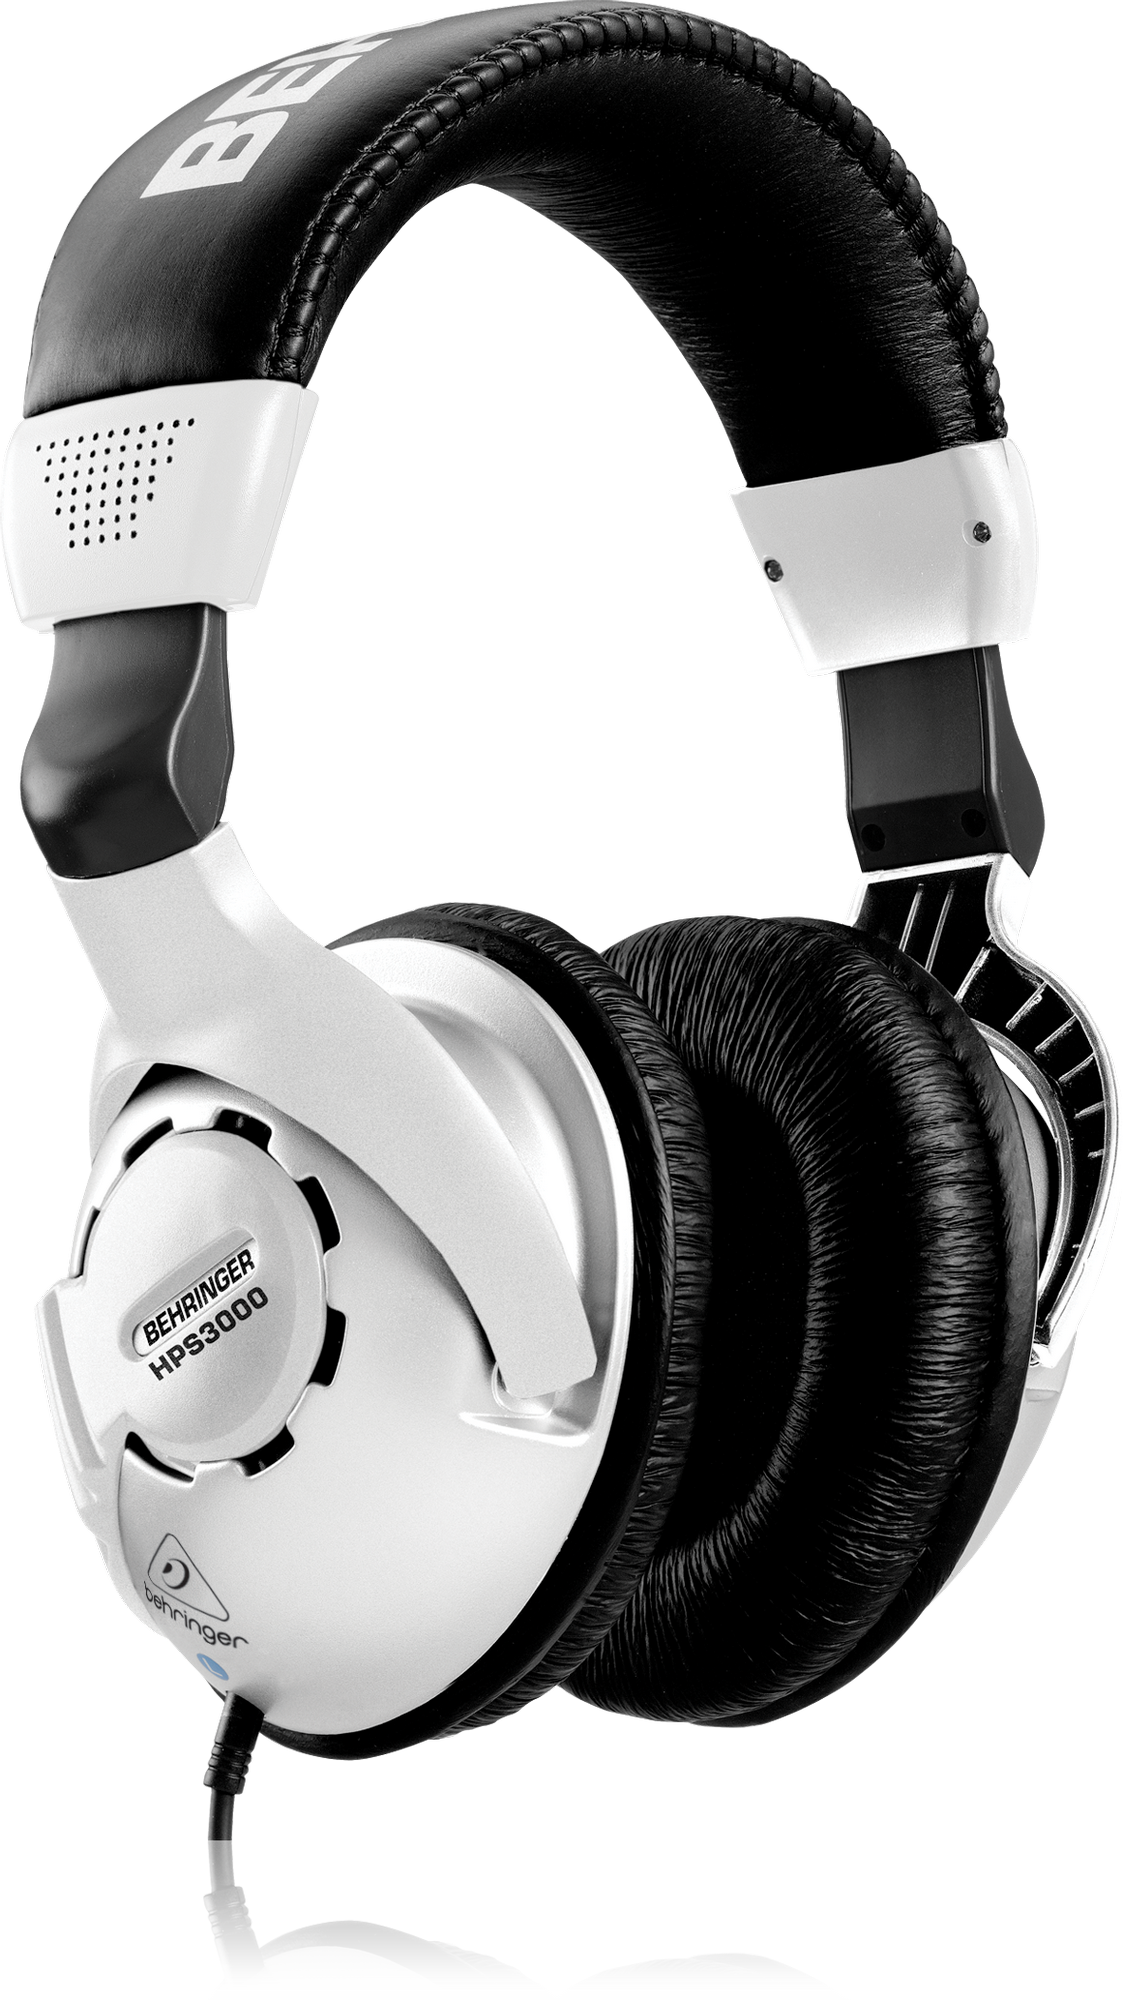 Everyone with a microphone needs headphones because whenever a microphone is turned on, it’s the only way to hear what’s on the air. They should be full-coverage closed-back “cans” because their job is to block room sound so you can actually hear what’s going on the air — like when a guest microphone is off! Full coverage means they press against the head all around the ear — not on the ear. Some headphones are “open” back or semi-open which don’t properly block room sounds — you can usually spot foam on those.
Since headphones are mostly used for level checking and balance — not high fidelity (broadcast studios are not recording studios) — and since they are often high-wear items, get cheap ones and consider learning to solder their cords back on. One station requires DJs to bring their own headphones.
Among others we’ve used are Behringer HPS300 5-packs and similar brands like Audio-Technica and Senheiser. “School” packs will probably work too, as long as they are full-coverage closed-back phones.
Most broadcast consoles have a single headphone output, which means that most stations will need to add a headphone amplifier — basically a fancy splitter. We’ve used the ART Headamp 4 and the Rolls HA43 and the cheap Behringer, Mackie and others are probably OK too. All you and your guests need is volume controls — so don’t splurge here unless you’re loaded.
Control-room Speakers
Once the microphones are switched off, you can hear the program audio over the (usually 2 for stereo) control-room speakers. These are switched off automatically as soon as a microphone comes on to prevent howling feedback and more subtle audio weirdness.
People will appreciate nice speakers on music-oriented stations, and we often put in decent speakers like the JBL 305P self-powered reference speakers, but any half-decent bookshelf speaker and amplifier, or computer speakers will work. You only need to hear if there’s anything blatantly wrong with your sound, and when to rush back to the microphone — recording-studio audio precision is not required.
Enthusiastic listeners have been known to turn ’em up too loud and blow the speakers, so you may want to lock, glue, or cover their volume controls.
Sound Coordination — Broadcast Console
All of the sound sources come together at the broadcast console, which is basically a volume control for every microphone, CD player and so forth. While broadcast consoles are a type of mixer, we often avoid that word since it is confused with public-address, live-sound and recording-studio mixers, which are similar but have different features.
Broadcast consoles are intended to be installed, configured once or rarely, and run like that for years; to be repariable, easy to train and use, easily accommodate stereo, and have features to help eliminate errors harmful to live broadcasts and FCC licenses. In some ways these features are the opposite of live-sound mixers. Live-sound mixers are cheap and with training and practice they’re usable, but they aren’t good, accessible long-term solutions. Digital consoles don’t offer enough advantages for tiny stations for us to recommend them.
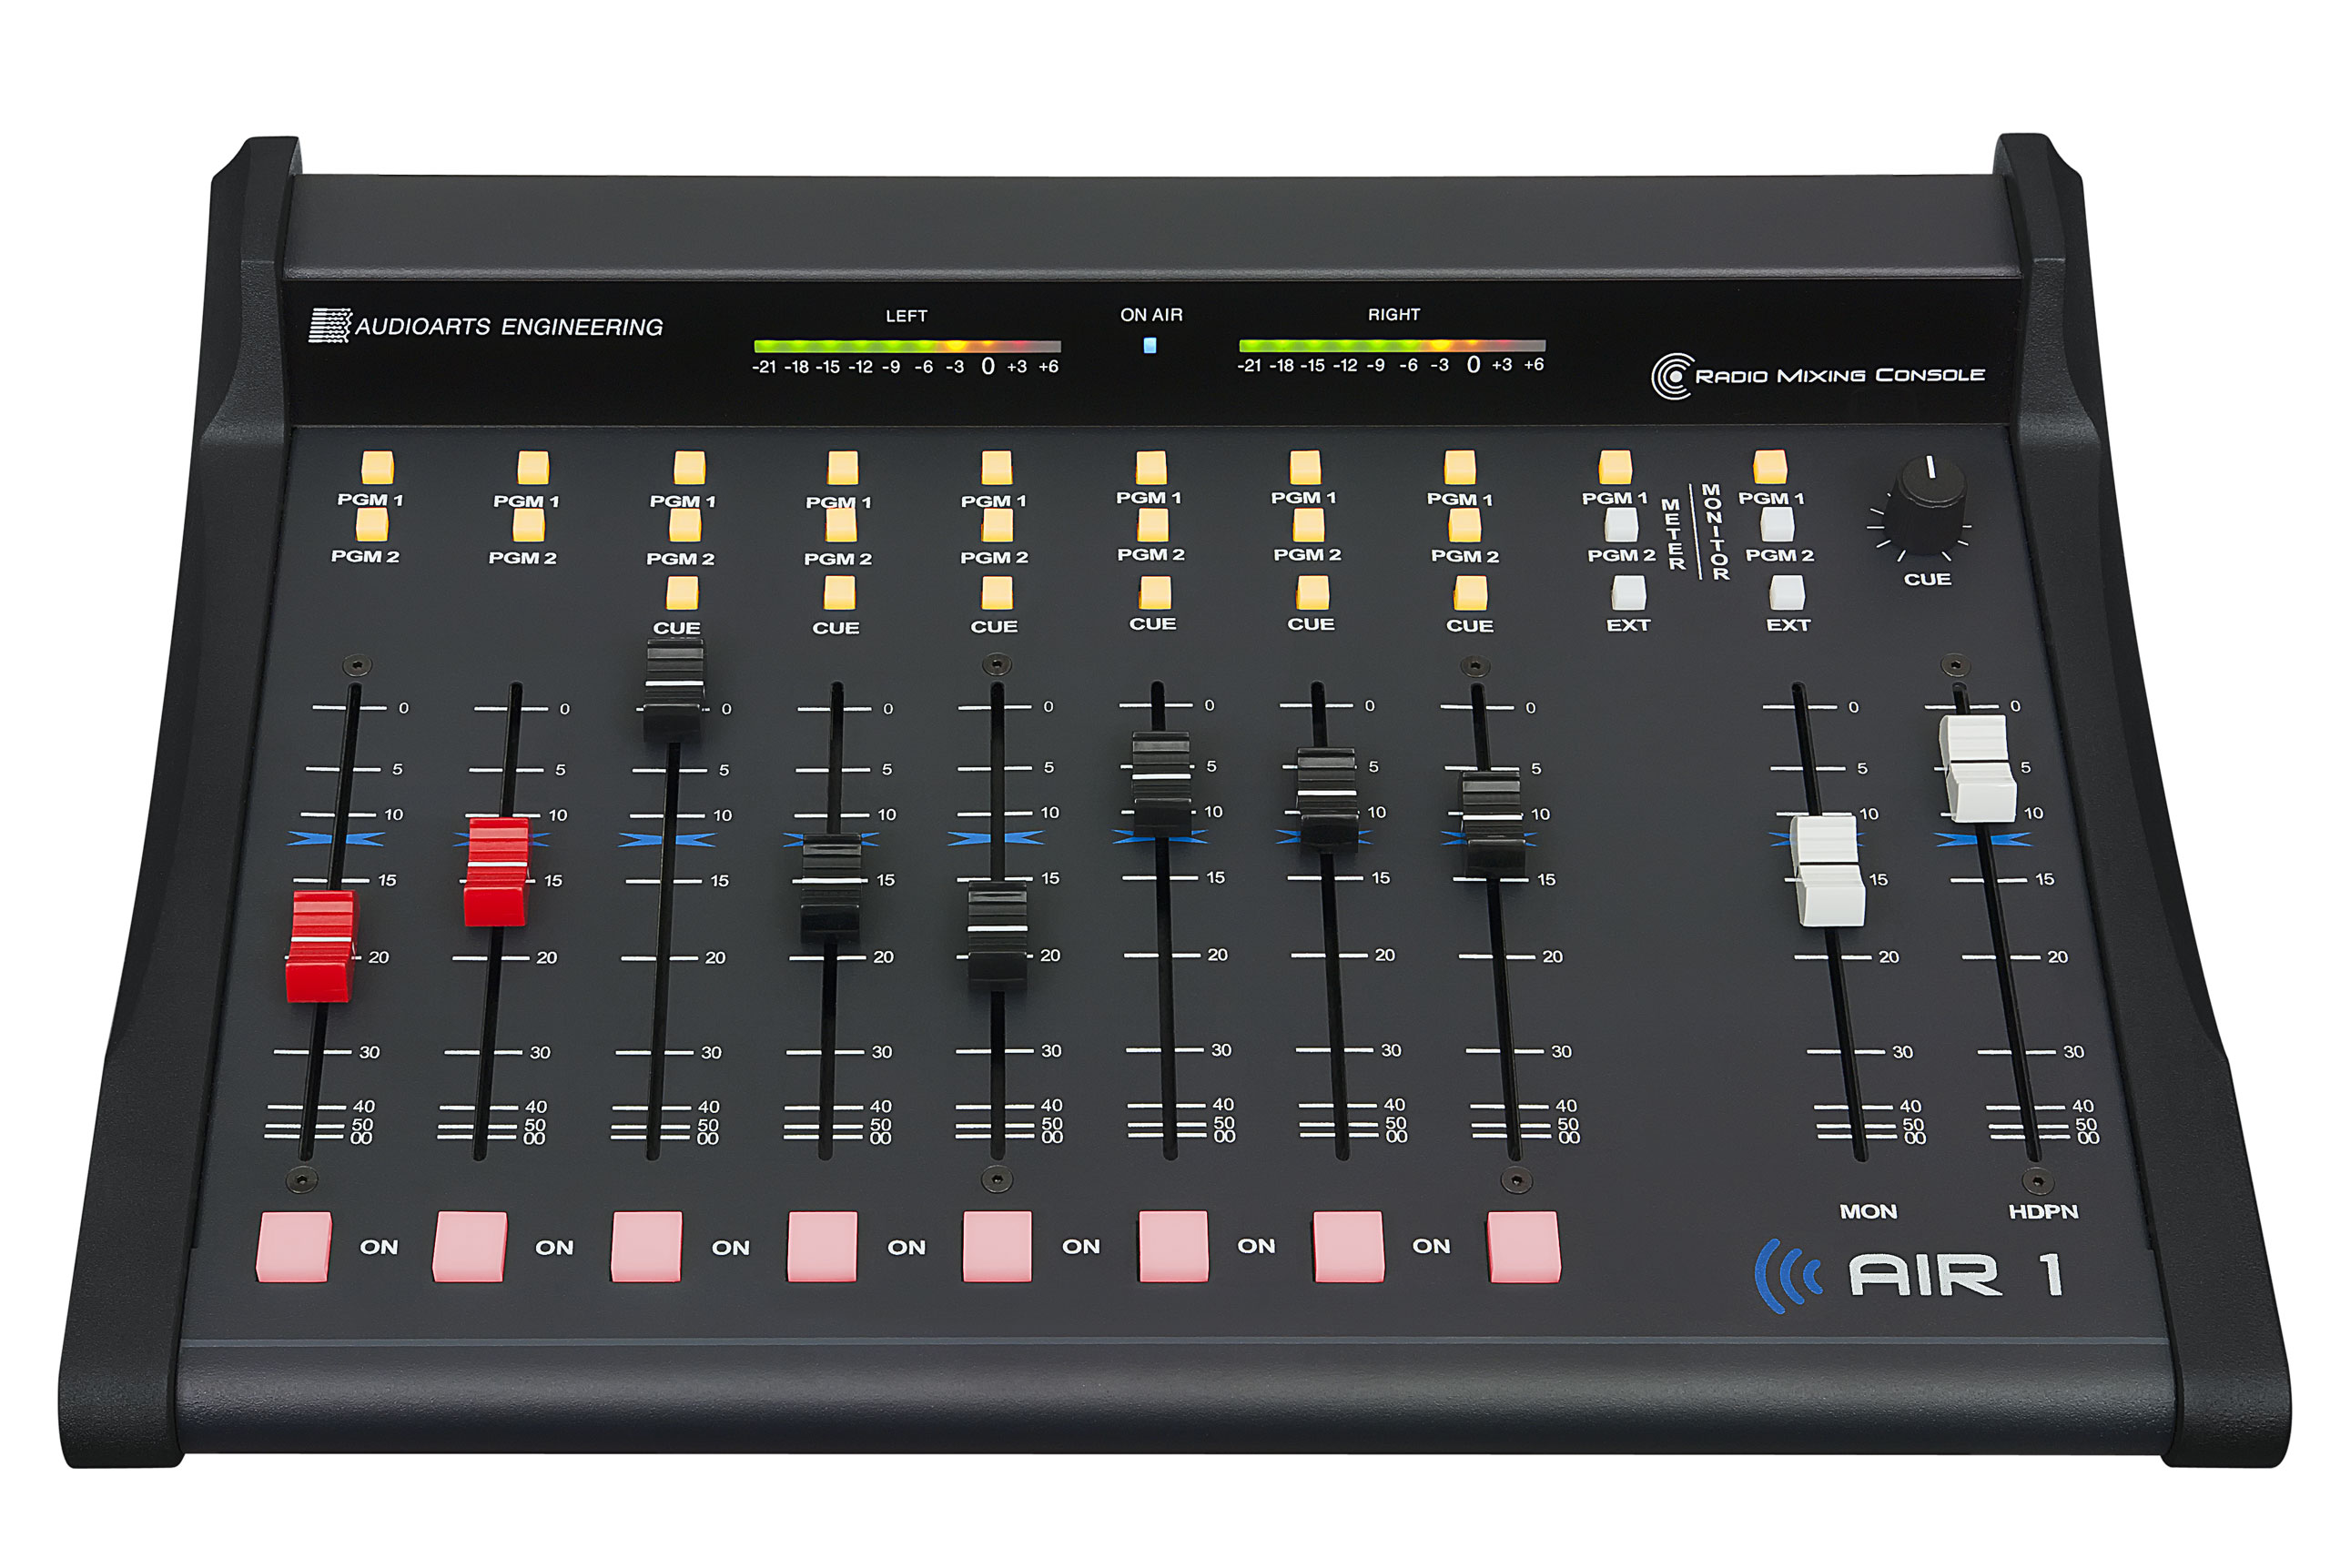 For our sample station we’re recommending the 8-channel Wheatstone Audioarts Air-1 or its smaller cousin the Audioarts 08 and bigger Air-4. These consoles are descendents of for example the Audioarts R-60 circa 1995, which stations are still using, so they do everything right — and they’re also expensive. We’ve also had good luck with the Arrakis 10-channel consoles, however if your antenna is pretty close, you’ll probably end up needing some RFI suppression (put Neutrik EMI XLR connectors on all the microphone cables to start, and get the 10BP model). The inexpensive 8-channel Arrakis was very difficult to use with an antenna nearby. D&R Airlite consoles have an interesting set of features and seem solid. We have high hopes for the Angry Audio console but not much experience yet. It’s a good bet that anything claiming to be a broadcast console, sold by a reputable broadcast equipment outlet, which isn’t the bottom-of-the-line model, will work well. If you have the right skillset to evaluate and install them, used consoles are a realistic way to save money.
Misusing a Cheap Live-sound Mixer
If you really must misuse a live-sound mixer:
- start with a 14-channel 4-stereo-bus-equivalent mixer to have similar capacity to an 8-channel broadcast console.
- They often have one or two stereo channels. To stereo-ize the others, glue pairs of faders together.
- For control-room automatic speaker cutoff, get the Angry Audio Talkshow Gadget.
The Allen&Heath XB-14 hybrid broadcast console has many of the same usability problems as a live-sound mixer so the following advice applies to both.
- Set the trim/tone etc on everything and then
- make a cover to prevent adjustments to all controls which generally shouldn’t be used live.
- Cover/lock the cables so people won’t re-arrange them.
- Laminate a detailed photograph of how things should be adjusted and connected so people have a fighting chance to fix problems left by the previous creative DJ.
- You’ll benefit from good DJ training and re-training refreshers.
Emergency-Alert System
Wonder where those radio emergency-alert messages come from? Stations pick up those messages from other radio stations (sometimes TV), and from FEMA over the internet, and then rebroadcast the applicable ones. The box which does that is usually just called an EAS, and is one of the top-three most expensive boxes of electronics at most stations. It normally passes your audio straight through to the transmitter, but during an alert, it cuts off your audio and plays the message.
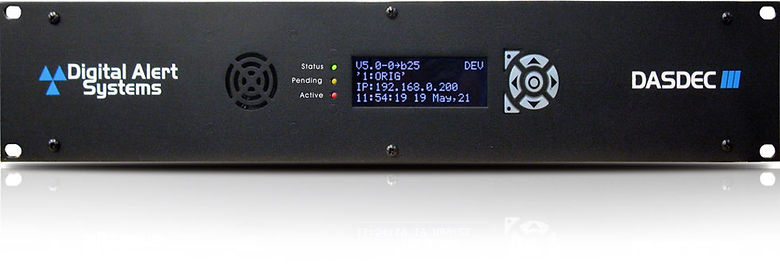 Since Sage stopped manufacturing their popular ENDEC units, we recommend the Monroe DASDEC-III. You’ll need to consult your official state EAS plan to figure out which model will work for you. These can be a bit complicated to connect, and unfortunately even more complicated to configure. Consider using their software subscription service to keep up with inevitable changes, and don’t hesitate to call them for support. Used EAS boxes are almost always older models which can no longer comply with new requirements!
STL – Studio-to-Transmitter Link
When your transmitter is further away from the studio than you can connect directly with a wire, a studio-to-transmitter (STL) link is used. Most STLs we build these days use codecs (Barix, Comrex, or simply software) to turn their audio into data at the studio, and back to audio at the transmitter. Data is transported over some type of network — most often either a private WiFi link or the public internet. WiFi congestion has increased dramatically over the years, particularly in cities, so those private links now require some careful engineering, testing and adjustment to ensure reliability. Meanwhile the wired internet has become more reliable, especially when the same internet service provider is used on both ends.
Transmitter
Most LPFM stations, most of the time, are going to save time, money, complexity, and maintenance headaches by using one of the highly-integrated “all in one” FM transmitters, which replace several expensive separate boxes. They incorporate a multi-band audio processor, stereo encoder and limiter to turn your audio into a high-quality FM sound, have RDS (text on car radios…) built in, and can be monitored and controlled from a web browser. Most LPFM stations should avoid transmitters without these features.
Typical LPFM stations are best off with a 300-watt transmitter and one we like is the Ecreso AIO 300W FM “Perform”, which claims to be engineered to run decades and in our experience that’s probably true. We also like the comparable Aqua models. Gatesair, Nautel and Crown are other good brands to consider. We used to install a lot of BW Broadcast units, but we’re concerned that a single distributor stateside has an effective monopoly. There are a few other reputable brands too, but beware that for example many Nicom and PTek models are simpler low-integration transmitters, and will need a bunch of add-on boxes (audio processing, remote control etc).
This is not something to shop for on Amazon or Ebay — use a reputable broadcast equipment distributor! Most of the FM transmitters on Amazon and Ebay and other less-expensive ones are not FCC type certified, are somewhat likely to interfere with aircraft or other services. BEWARE used FCC type-approved FM transmitters, which are usually the simple type and may need a lot of add-on boxes, because used FM transmitters are often NOT FCC type certified even though they’re perfectly acceptable for non-LPFM stations. The FCC enforcement bureau fines stations using transmitters which are not type certified and/or case interference.
Transmitter fans are necessarily noisy because to remove unwanted heat, so consider putting them in a different room from the microphones .
Transmitters are expensive and antennas are around lightning, so don’t forget lightning protection.
Connect Transmitter to Antenna with COAX
Once your transmitter has turned your audio programming into radio energy, it flows through coaxial cable or “coax” to the antenna, which is specially made to transport radio energy without losing a lot of it on the way. Coax needs to be chosen carefully and there are many different kinds. Luckily most LPFM stations with antennas not much more than 100 feet from their transmitter, will be able to use inexpensive LMR400 coax from Times Microwave with is very widely used and can be purchased with connectors already installed. Local WiMAX and industrial WiFi suppliers probably have it and the tools and connectors on hand. It is flexible enough that you won’t need to add more-flexible sections (jumpers) needed with stiffer coax.
If you’re going over 100 feet, or simply want to save a minuscule amount of electricity, most LPFMs will be able to use LMR600, or so-called “half inch” coax like Andrew LDF-4 heliax or Commscope LCF12-50J. If someone tries to sell you 5/8″ or larger coax, ask them to calculate the power lost and cost compared to half inch and LMR600, since it may not be worth the money. And it’s not just the cost of the coax, but the connectors are more expensive, and the heavier weight can incur costs. In either case, if you use one of these stiffer cables, you are more likely to need short flexible jumpers at the antenna and/or transmitter, which means more connectors, cost, weatherization and points of failure.
Lightning protection is important because radio equipment is expensive!! Protection devices comes in a few different types — all require solid earth grounding. We often use a gas-tube arrestor (Polyphaser, Times Microwave) at the egress through a wall, and a strategically-placed coax ground kit or two, but the system should be designed and installed carefully with your particular cabling and site in mind!
Antenna
Check out our [link to sound around town?] guide to antenna types and locations.
Antenna choice is extremely “it depends”, and there is a lot of lore and “wisdom” which is inappropriate for LPFM, or simply incorrect, especially about improving coverage with different antennas. The FCC regulates the nominal broadcast distance of LPFM’s to 5.6km. Unless manufacturers lie about their antenna gain, when antennas are properly installed and powered, broadcast distance won’t change. Even the important difference between circular and linear antenna polarization is not always noticeable at LPFM power levels.
Without going into explanations and theory, here are some anecdotes of antennas we’ve known:
For best coverage, choose a circularly-polarized single-bay (unless your FCC authorization requires multiple bays) antenna of the double-V or “penetrator” design. Many stations use the moderately-priced Nicom BKG-77. If you’re dedicated to maintaining your best coverage during ice storms, install the radome too. Spending more for the same-design antenna from a top-shelf antenna company (Jampro, ERI, Dielectric, PSI, SWR, Shively etc) won’t improve coverage although there are other potential benefits, and conversely spending less won’t impair coverage either unless the antenna has a design problem. We don’t have experience with the Chinese FMUSER CP100 antenna yet — let us know if you try one.
Many stations use circularly-polarized antennas which are variations of the “ring stub” design, which include the OMB MP-1 (common and low cost), Nicom BKG-88 or even-more compact Micronetixx FML and Jampro JLCP. These can be substantially lighter than the double-V antennas, enabling you to use a simpler and lighter-weight support structure. While ice or snow are stuck to them, they will “de-tune” more than the large double-V antennas, reducing coverage. Most have optional radomes to protect from ice and snow power reduction.
Most LPFMs using single-bay circularly-polarized antennas will need transmitters to produce 210-250 watts, and end up purchasing 300-watt transmitters. Off-grid stations and those saving money using a lower-power transmitters sometimes install the Norwalk NWE-34 antenna. It is rugged, lightweight and inexpensive, and has the highest single-bay vertically-polarized gain possible — even a 50-watt transmitter can achieve 80-90 watts ERP (most LPFMs are permitted 50-100 watts ERP, and there’s often no noticeable coverage difference between 90 and 100 watts).
A “cheap” antenna often used in pirate radio also solves occasional problems for LPFMs. The NCG Comet CFM95SL is extremely lightweight so is super-easy to mount, doesn’t look like a (scary?) FM broadcast antenna which can help where appearance is a factor, and it is so thin that it somewhat disappears against the sky. It’s widely available which can help if you’re in a hurry, but you have to tune it to your frequency yourself and it can be finicky. They are easily damaged with too much power, and they don’t use the standard “N” connector so you’ll need an inexpensive N female to PL-259 adapter.
Attic
web stream
phones
live remotes
PDU/conditioning
distamps
mic booms/arms
19″ electronic-equipment racks
Furniture & rooms
acoustics
purchasing sources
detailed plans
skills needed — who’s gonna build it